How to Build a Camp Fire in Any Situation

Fire starting is a crucial skill for any overlander. Let’s learn the basics, then dive into fire building tips for wet weather, high wind, and snow.
Building a fire is the most iconic, time-honored skill in the outdoor world, right up there with pitching a tent. Sure, in the 21st century, we may have high-powered headlamps and lanterns to light our campsites and fancy butane stoves to cook our meals, but plain ol’ campfires are still worthy of respect.
From drying clothes to cooking meals to providing warmth, light, protection, and a gathering place, fires are an invaluable tool in the wilderness.
Any overlander worth their salt should know how to build one.
In this article, we’ll cover what you need to build a campfire, the three main styles of campfires, and a step-by-step overview of campfire building. Later, we’ll talk about campfire safety and tips for building a campfire in poor conditions, such as rain or high wind.
What Do I Need to Build a Campfire?
Fire is a combustion process, so it requires oxygen, fuel (wood), and heat. These three ingredients make up the “fire triangle.”
Remove any one of these three elements, and the fire will die. For example, if you smother a fire with dirt or water, you are cutting off its oxygen supply. Similarly, if you remove the fuel source, the fire will eventually burn out.
Campfire Oxygen
Oxygen is all around you. You’re breathing it right now! So, unless you’re camping inside a vacuum, you don’t need to worry about adding oxygen to your fire. However, you need to construct your fire so that oxygen can access the flame. Gently but powerfully blowing into your firebed can also help to sustain the flame. More on this below.
Campfire Fuel
It’s not as easy as pouring lighter fuel on a stack of logs. A proper campfire utilizes three different classes of fuel: tinder, kindling, and firewood. Each burns at different rates and intensities.
Tinder
This is the first thing you’ll light and the easiest material to ignite. Though it ignites easily and quickly, it burns just as quickly. You’ll need to replace tinder with kindling before long, or your fire will go out. Tinder consists of small, dry items like:

While it’s easy to find tinder in good conditions, in wet weather or winter climes, it can be quite difficult. That’s why bringing tinder with you into the backcountry is always a good idea. Store it in a waterproof container, like a water bottle or jar.
Kindling
Kindling catches fire from the tinder and provides the heat necessary to ignite the fuel wood. These are small sticks and twigs that are slightly larger than tinder. (Think pencil-size.) Kindling acts as an intermediary between tinder and firewood, and helps build the fire's intensity.
Firewood
Fuel wood, consisting of larger logs, burns slowly and steadily, sustaining the fire for an extended period. Start with smaller pieces, only slightly larger than your kindling, and gradually add larger ones as the fire grows.
Campfire Ignition
Fuel and oxygen are usually plentiful in the wilderness. What’s hard to find, sometimes, is a heat source. This can be a lighter, matches, a ferrocerium (ferro) rod, or even two rocks struck together—anything that can create either a flame or a spark.

For obvious reasons, a tool that can sustain a flame, like a lighter or a match, makes it easier to start a fire, but if you have a reliable source of dry tinder (below), then a simple spark can do the job.
Extra Firebuilding Equipment
The above items are the basics, but there are other things you might consider using to help make building campfires easier. These include:
- Firestarter: Commercial firestarters or natural materials like fatwood can help get fire going quickly. Commercial firestarters can be invaluable in wet or windy weather or other situations where tinder/kindling isn’t on-hand.
- Hand ax: For splitting larger pieces of wood into kindling and firewood.
- Shovel: To clear a safe area for the fire and create a fire ring if necessary.
- Water jug: For extinguishing the fire completely after use.
Three Types of Campfires
1. Log Cabin
Perhaps the easiest and most straightforward method. A log cabin fire is stable and provides a good base for cooking. Log cabin fire building consists of stacking logs in a square, like a log cabin. You’ll start with tinder and perhaps a bit of broken kindling in the center, and build the “cabin” around it.

Start with inch-thick pieces of fuel wood, parallel on either side, and then place thinner, kindling pieces on top of these, parallel to each other across the top, like Lincoln Logs. Build up from here, until the cabin is four to seven layers. You can always add more as it grows.
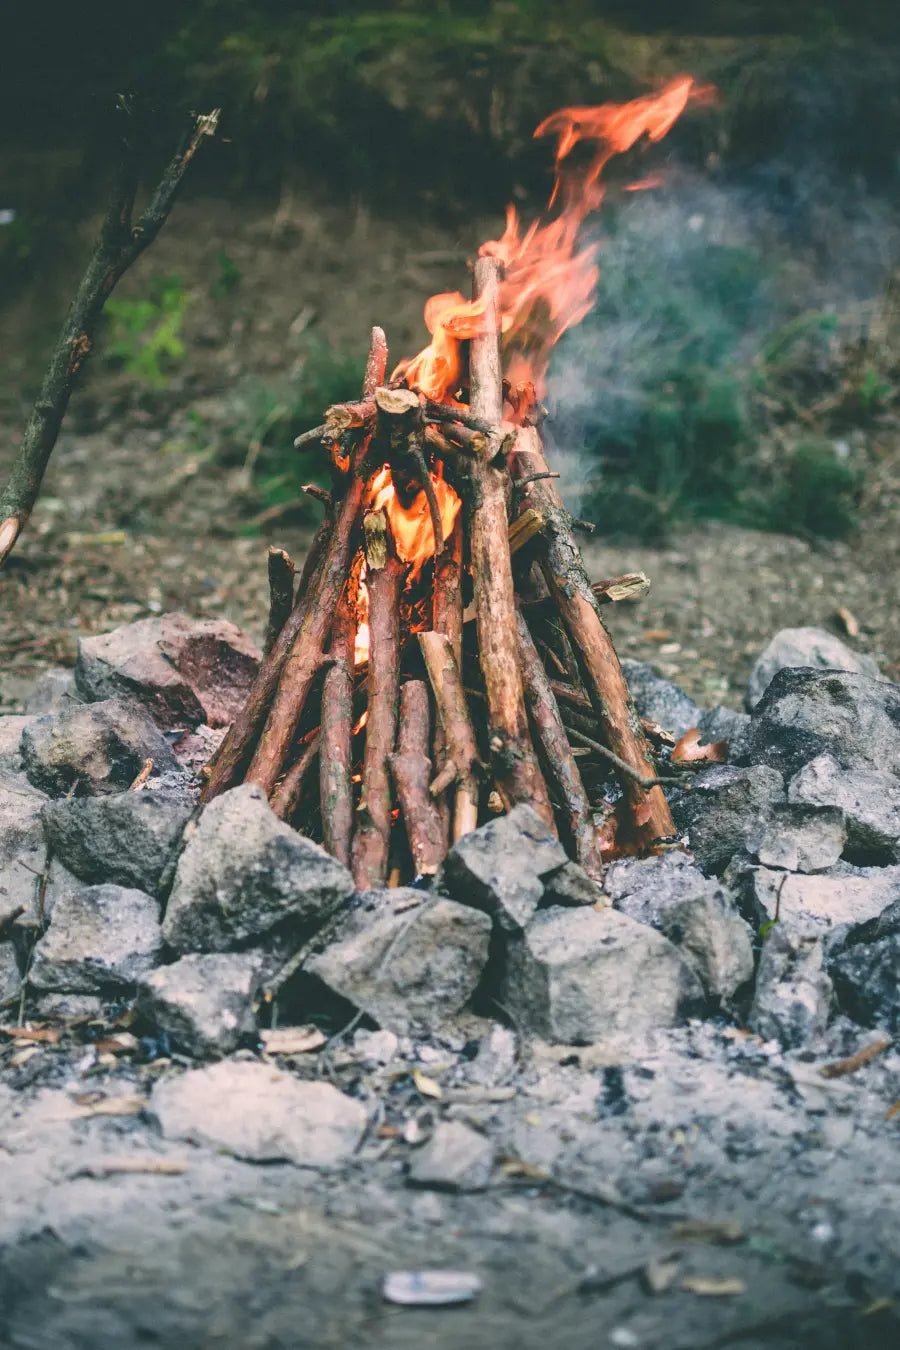
2. Teepee
The teepee method is another classic strategy. As the name suggests, a teepee fire is built by arranging your kindling at 45-degree angles, in a cone-like formation, around a pile of tinder. Leave a small opening on the leeward side (away from the wind) so you can deliver heat to your tinder.

The teepee structure allows for good air circulation, promoting a quick and easy ignition. It also makes for a taller, more impressive flame—good for campfire gatherings. The downside is that it’s a bit less stable to build than the log cabin, and can be prone to falling over if your wood is shaped irregularly.
3. Lean-To
A lean-to fire is a good choice in windy conditions. You’ll lean your kindling up against the leeward side of a thick log, using the log to block the wind. The result is a structure that looks like a lean-to shack, with an opening on either end to allow airflow.
Building a Campfire: Step-by-Step
1. Gather Materials
We cover the materials above, but again, you need tinder, kindling, and firewood. Collect dry leaves, grass, bark, or small twigs for tinder. For kindling you’ll want small sticks, about the diameter of a pencil. Beyond this, find increasingly larger pieces of wood for the core firewood.
Remember, all tinder, kindling, and fuel wood should be dry and easily combustible. Wet or damp wood will not ignite easily, and will produce excessive smoke. Look for dry leaves, grass, pine needles, bark, small twigs, and branches for tinder and kindling.
For firewood, hardwood varieties like oak, maple, and hickory are ideal, as they burn longer and produce more heat than softwoods like pine or cedar. Avoid using wood that is rotten, moldy, or covered in insects, as it may not burn well and could release harmful fumes.
Gathering enough wood to sustain your fire is crucial, especially if you plan to keep it going for an extended period. It's a good idea to gather more wood than you think you'll need, as it's always better to have too much than too little.
2. Build the Base
Now it’s time to prepare the base. Regardless of the type of campfire you build, the beginning should be the same. You’ll place a small pile of loosely packed tinder in the center of the fire pit. Ideally, this “pit” is slightly dug out, providing a windbreak for your tinder.
Around or above the tinder, arrange your kindling in the manner described above (teepee, log cabin, lean-to), leaving space for air circulation. Keep larger logs on standby nearby, or place them in a position at the edge of the tinder/kindling fire so that they can begin to heat.
4. Light the Tinder
Carefully ignite the tinder using a match or lighter. Tinder will light easily, the trick is making sure the tinder stays lit long enough to light the kindling around it, as tinder burns quite quickly. This can take time, so be patient, and add more tinder as needed. Guarding the flame from the wind using your hands or a large object, such as a camp cooler, can help.
5. Feed the Flame
Once the kindling catches fire, gradually add larger pieces of fuel wood, being careful not to smother the flames. Keep building the fire in a way that allows oxygen to reach its heart.
If your fire is struggling, steadily but gently blowing into the firebed will help (this provides oxygen to the combustion reaction.) Avoid puffing. Instead, purse your lips, get as close to the fire as you safely can, and blow slowly and consistently.
6. Put it Out
It's crucial to extinguish your campfire completely before leaving it unattended. Forest fires are a serious issue, and only becoming more so as our planet’s climate changes.
When you're done with your fire, allow the wood to burn down to ash, and pour water over the embers until they are cold to the touch. Stir the ashes and repeat as needed. Make sure there are no remaining hot spots before leaving the area.
Proper Campfire Safety
Campfire safety is your top priority anytime you build a fire. Wildfires are a threat to not just indigenous flora and fauna, but human life and property.
Above all else, ensure you follow local fire regulations and obtain a permit (if required) before building a fire. Fire regulations vary by wilderness area, and by county, state, and season, so you should be aware of current regulations every time you head outside to build a fire. There are many regions, particularly in the West, where campfires are prohibited entirely. Here are more campfire safety tips.
Tips for Building a Fire in Bad Conditions
There’s no way around it; building a fire with wet wood or in high winds is quite difficult, and makes for a longer, more involved process. Use a bigger pile of tinder, gather more fuel than you think you need, and be patient. If you’re struggling to find dry wood in wet conditions, look for dead standing trees and search under fallen trees, overhangs, or rock shelters. Here are a few more tips:
Use Windbreaks and Shelters
In high winds or rain, look for natural shelters like caves, overhangs, or dense tree cover. If none are available, you can create an artificial windbreak using a tarp, rocks, or logs.
If wind is your enemy, build your fire with as low a profile as possible to minimize wind exposure. If the ground allows it, dig a shallow pit to protect your flames and embers.
Platforming Your Fire
Even if your fuel is dry and wind isn’t an issue, it’ll be extremely hard to get it started on wet ground. Choose an elevated, dry area whenever possible. If the ground is wet, build a platform using logs or rocks to elevate your fire. In snowy conditions, this will also prevent the fire from being extinguished by the melting snow around it as it burns.
Split Wood & Shavings
Even if wood is wet, it may not be wet all the way through. Split larger pieces of wood to expose the dry inner layers. If needed, you can create wood shavings from these dry inner layers to act as tinder and kindling.
Additional Heat
A reflector like a piece of aluminum foil or a shiny metal object will heat back towards the fire and help it burn. While not viable in windy conditions, in wet or snowy weather a candle can also help dry out kindling and provide a consistent flame source.
Artificial Firestarters
In emergencies, artificial firestarters can pick up the slack. In addition to the firestarter logs you can find at most gas stations and outdoor gear shops, high-proof hand sanitizer or alcoholic wet wipes can be used as a fire starter, as can high proof liquor, mouthwash, or any other substance with a high alcohol content. Other options include cotton balls soaked in petroleum jelly and dryer lint combined with melted candle wax.
Conclusion
All outdoor adventurers and overlanders should be comfortable building, maintaining, and extinguishing a fire. Along with orienteering and pitching a tent, it is perhaps the cornerstone of wilderness survival.
By understanding the science of fire, selecting the right materials, and mastering the art of campfire building, you can create a warm and inviting space that will cook food, create warmth, dry your clothes and gear, and bring people together. Just remember, campfire safety is the top priority. If you are still looking for a place to camp, check out our How to Find Camping Near Me blog for all the best resources for finding free camping.
About the Author: